

About
Popular Posts
-
Photos by Thomas Whiteside for Elle Magazine Last week while reviewing Elle magazine, I noticed a new fashion trend. And I’m not talking ab...
-
Great and modern furniture and accessories all from The Foundary. I’ll have the light wood console. All of them are simply amazing. Woo...
-
2014 is coming this way pretty soon (just five weeks from now) and I'm just starting to prepare for this upcoming year. Since 2013 was a...
-
Having 3 little kids living under the same roof can sometimes be a daily challenge when it comes to organization. I'm that kind of perso...
-
When we moved to our new home, the fireplace was one of the areas that I wanted to "stand out". Being so close to the entryway and...
-
Being a Pinterest-enthusiast as I am, there is not a day when I have to remember myself that I need to take some time to make just one craft...
-
To start my design proposal I used the app Paper by 53 on my iPad. An easy way to sketch your ideas. At times approaching a blank space to ...
-
Say it with love... but this time around, love for nature. If you've been reading my blog for some time now, you should know about my ap...
-
Some of the items used for this collage, including the deer head, are an excellent idea for gifts for Father's day. I have to say that ...
-
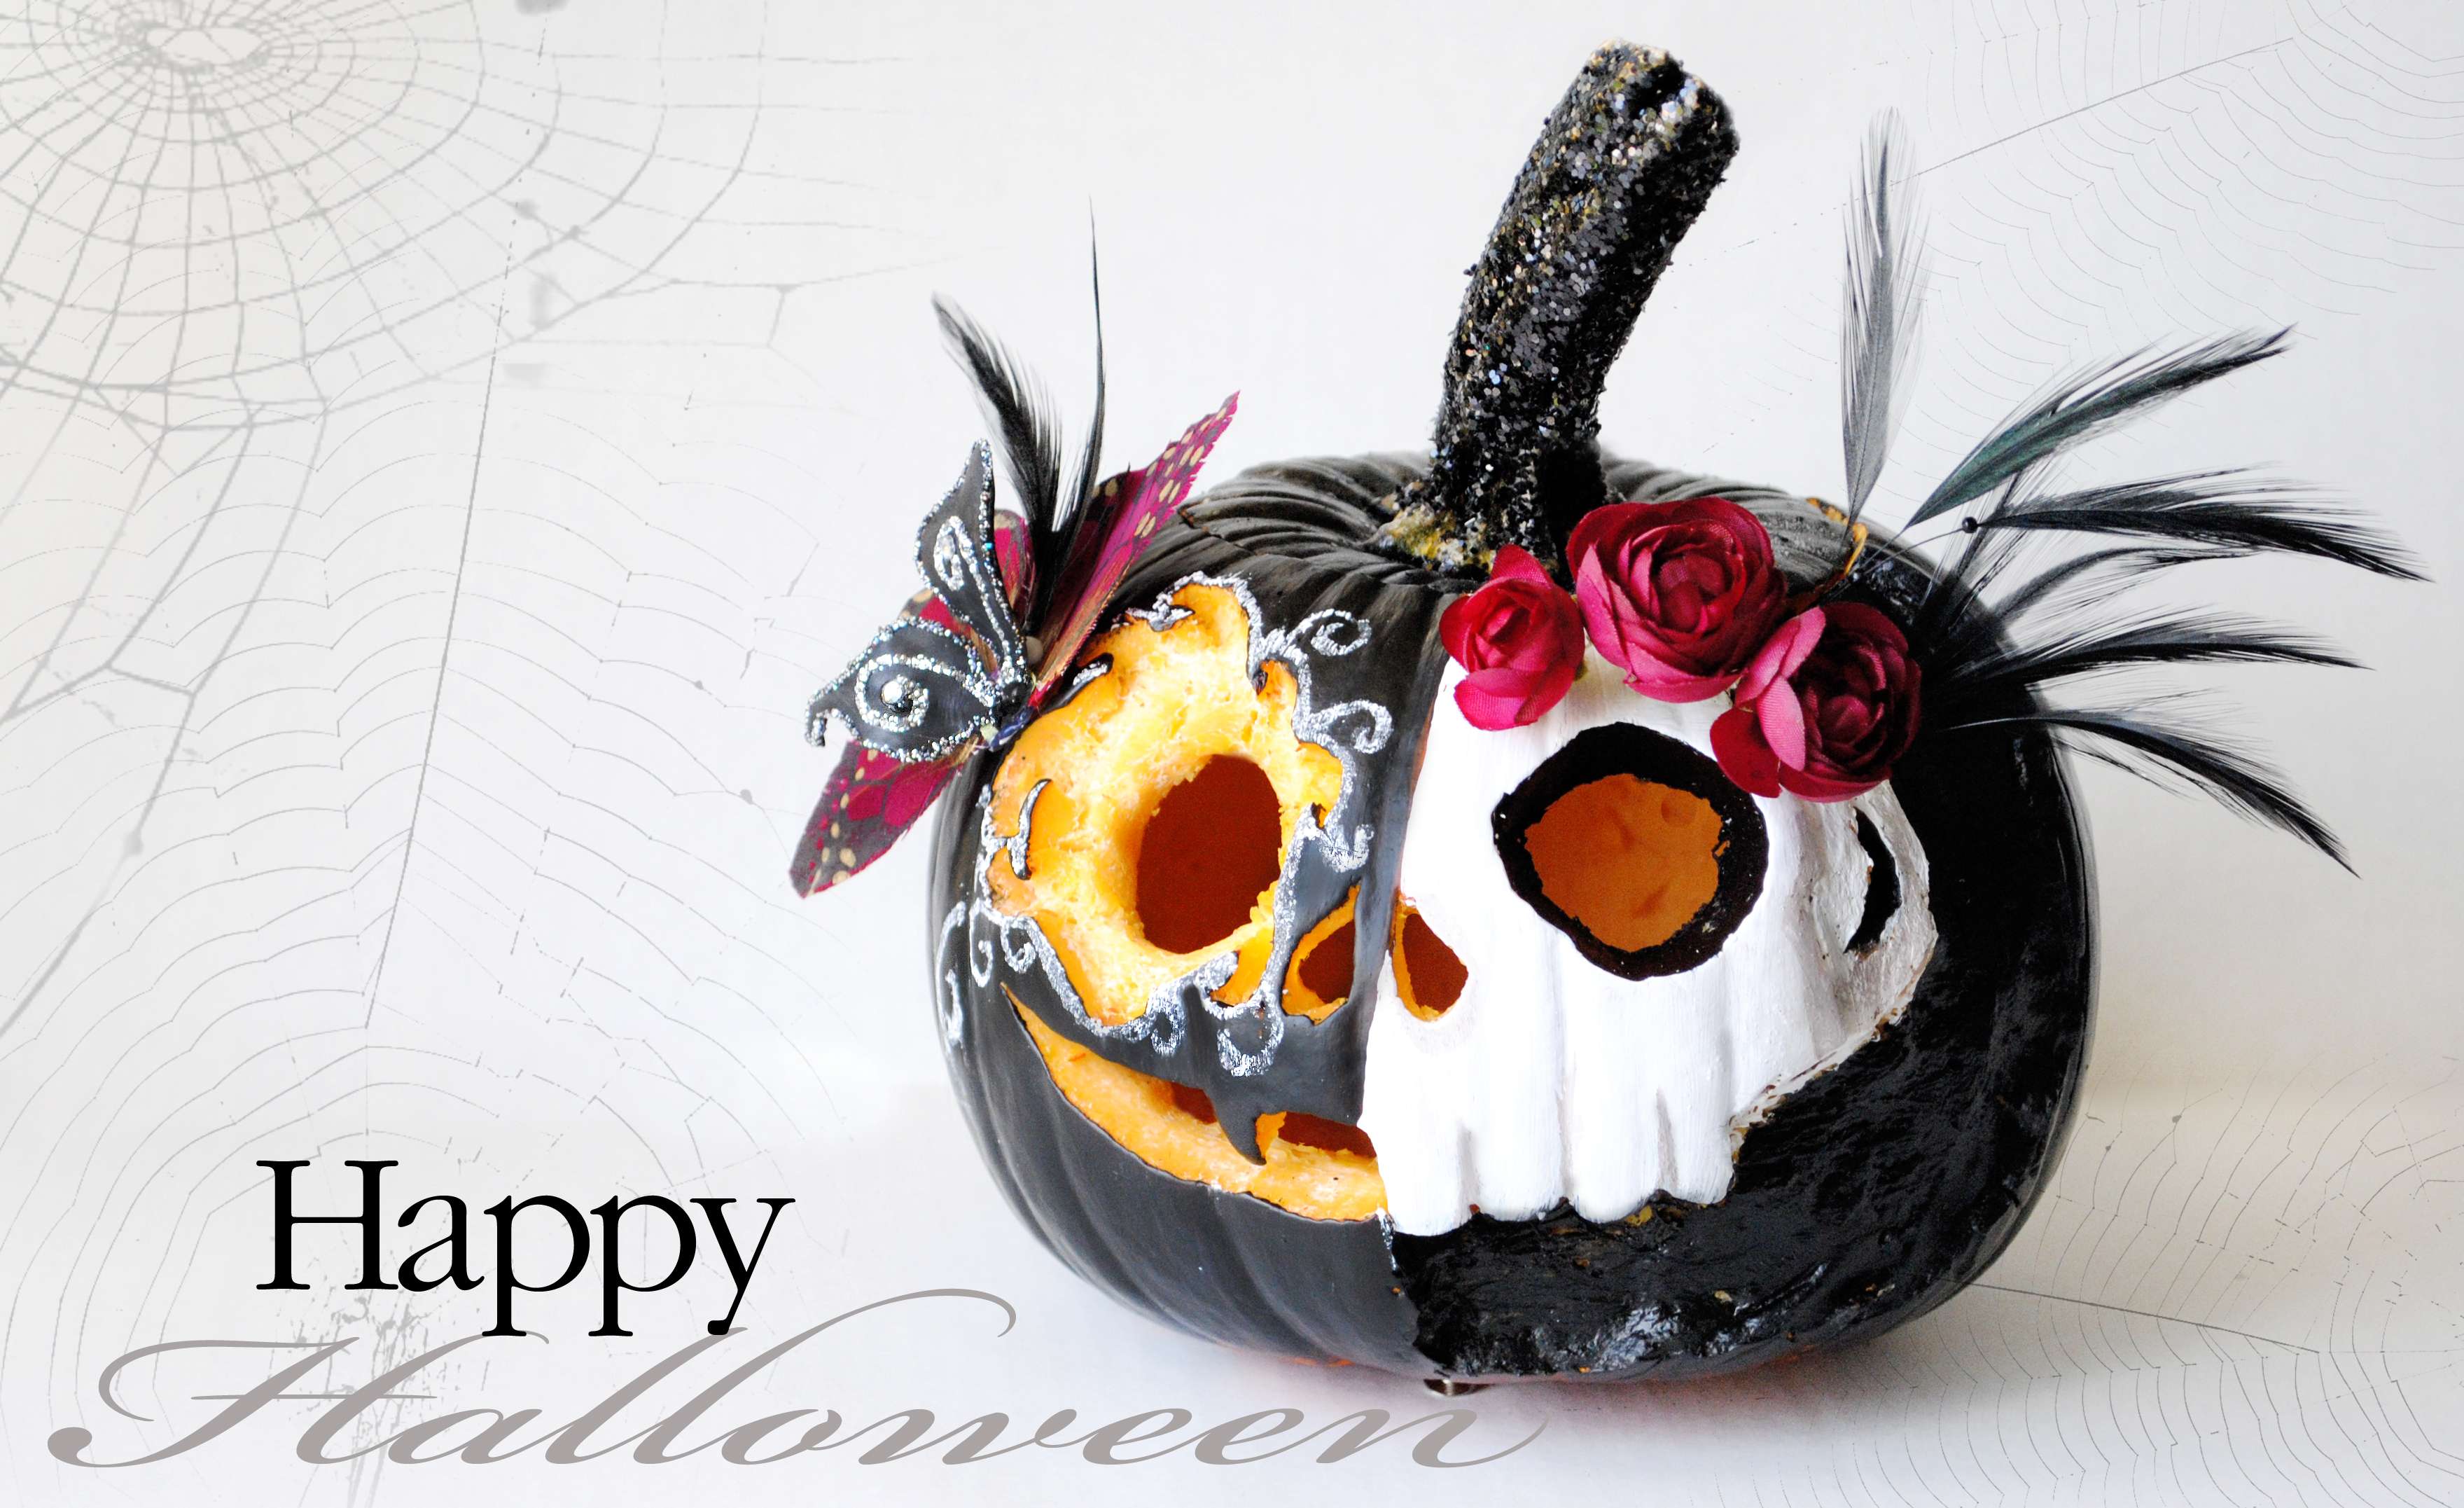
I know this tutorial might come a bit late, but Christmas decoration came earlier this year with the Home Depot Holiday Style Challenge . No...
more details on how its done please! For those of us who aren't as crafty and need directions
ReplyDeleteHi! I'm so sorry for this. I did not plan for this to be a tutorial but more of an inspiration photo. I can give you some written guides that might help you with this.
DeleteFor this the left side of the pumpkin (the black side), I used chalk paint but before painting it, I did the eye with a cookie cutter. Both the mouth and nose were cut by hand using a carving tool specially for pumpkins.
As for the butterfly, I bought it a Michaels and cut two different ones in half and paste one over the other. Also for the eye, and after painting the pumpkin, I draw the swirls.
On the right side I also carved it by hand but maybe you could try tracing a desired design before carving. The black and the white paints on this side are just acrylic paint and the flowers and feathers are glue with a glue gun.
Hope this helps, if not let me know to see how I can help you out.
Thanks for stopping by!